It's June and the house construction progresses at a painfully slow process. Dogged by some bad weather and unforeseen problems, the digging and scraping of the foundations continues. At one point last month the builder had to get a pump to remove the water from the garage excavation (swimming pool). I decided to make a time lapse video of the excavations and the concrete pouring.
Time lapse is used to compress time - for example, you shoot one frame a second for 20 minutes then play it back at 15 or 20fps to speed up the passage of time. In this way you can easily illustrate something that takes a long time in real life, in a very short time onscreen. You can also just shoot video and speed it up 1000%, or more, but even with the best settings, you'll find you can only run the video for a short time, then the DSLR either stops, jumps to another (recorded) block on the memory card, or develops overheating issues with the sensor.
In both these examples I added some shorter video clips into the time lapse sequences. All in all I shot some 4,000 frames in the first video and 5,000 frames for the second.
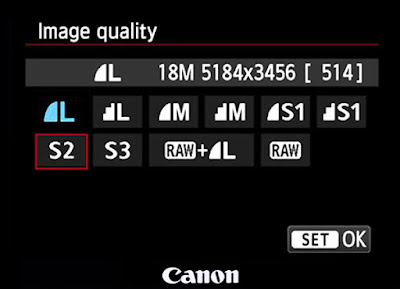
One good trick is to choose the lowest resolution setting otherwise your camera's memory card simply cannot keep up with the date rate (unless the time lapse is set to let's say, one shot per 20 seconds, in which case there's no problem - but you will have to reduce the resolution in the video processing software so it's better to do it at the time you capture the stills. Most Canon cameras have three resolution settings: Large, Medium and Small. They'll also have two or three different 'small' settings, including 1920x1280 pixels - which is HD video - perfect for time lapse.

No comments:
Post a Comment